 | |
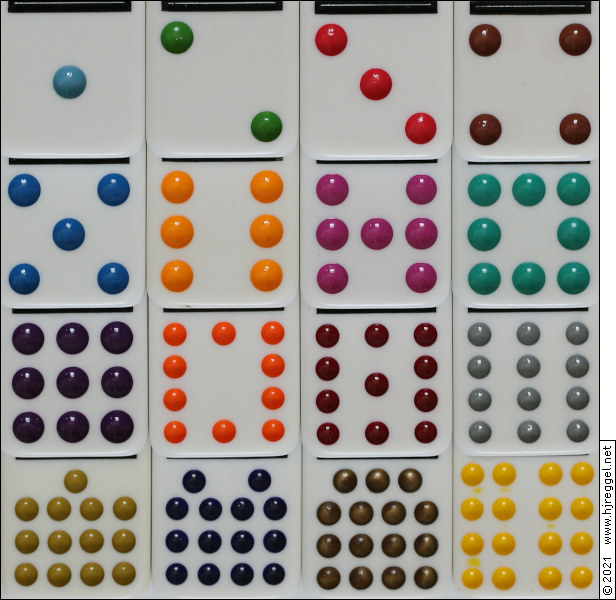
| Regular Domino Tiles from 1 to 16 | |
funCUBING Index Page · funCUBING Projects · The Domino Project
After I had recognized the "Domino Principal", and mastering the making of the 3×3×3 Domino Cube , I checked for other possibilities. While I already had all of the parts for the 3×3×3, one of the few options was building a 4×4×4 Domino Cube from black and white ones with identical mold.
But can we really apply this principle to higher order cubes? Is there a risk of creating identical cubies on the inner layers? No. The "Domino Principle" uses the same number along the projection from one face to the other. For a corner cubie, the column created by the projection only consists of edge cubies, so edge cubies will inherit the number from corner cubies. For an edge cubie, the column runs across inner face cubies. On a 4×4×4, these are only inner face corners. On higher order cubes, inner face edges and corners alternate, but on different rings. The different colors of the halves are used to distinguish the number twins that would exist, once the middle of the column is crossed. However, nobody wants to deal with a dot pattern of 36 dots on a 6×6×6 cube.
For the 3×3×3, I could simply use the same dot layouts as for the regular Domino. For a 4×4×4 Domino, numbers up to 16 are required. Domino tiles are availble up to Double-18, so there is already a sample layout.
The original Domino tiles have some strange dot layouts that prefer symmetry instead of sticking to the dot grid. Because the original Vintage Rubik's Domino used one alternate dot layout, I decided to continue this tradition, whenever applicable.
First, I definitely wanted to keep the U-shaped number seven. Because number eight was kept in ring shape, number ten will be kept in ring shape as well. Number eleven has symmetry, but the middle dot is off the grid. Therefore, I moved the dots downward to respective grid positions, resembling the U-shape. Number thirteen has one single centered point, I decided to keep it centered instead of moving it towards the outer edge of the cube, where it could easily get lost. For number fourteen, I moved the outer dots of the centered triple outward to the repsctive grid positions. Number fifteen is simply a combination of the latter two. Because there is no number above sixteen, the dot layout became evenly split, instead of leaving room for more dots.
Most regular Domino tiles use two different dot sizes, one for numbers 1-9, the other for number 10 and higher. Some Domino tiles use bigger dots for lower numbers, similar to Mahjong tiles. Because the 4×4×4 Domino has a layout of four rows, the change of dot size would happen within one line. For the 4×4×4 Domino, the same dot size and grid should be used on each line.
In general, a 4×4×4 cube has a total size of 60-62mm, leading to a cubie size of 15-16.5mm. Rounded edges and corners have to be taken into account, so the maximum area is a 12-14mm square. Isolated small dots tend to come off easily, so the aim was to maximize the dot size. Numbers 1-4 can be created based on a "five" grid, where three dots have to fit a diagonal, but not horizontal or vertical. Numbers 5-8 use the regular "nine" grid. The number 9 starting the third row already uses the smaller dot size, but the dots are evenly split across the frame. Numbers 10-12 use the "twelve" grid, numbers 13-16 the "sixteen" grid, both lines using the same dot size.
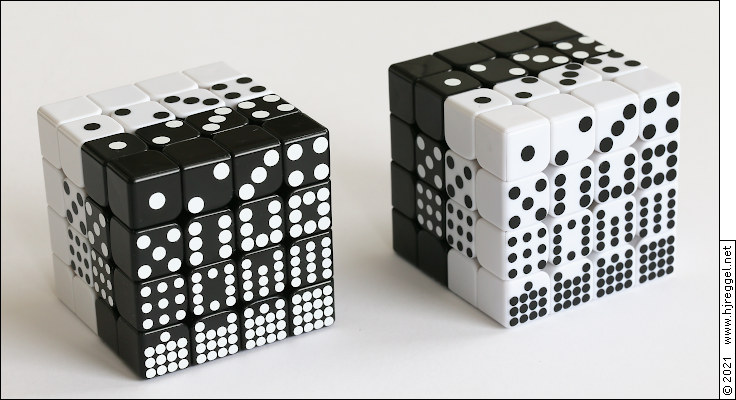
Here is the result, a pair of 4×4×4 Domino Cubes (leading black and leading white side), built in June 2021.
 | |
| A pair of 4×4×4 Domino Cubes. Halves identified by color, permutation by domino dots. Left: leading black side, right: leading white face. | |
But wait, that's not all. By using dot patterns on the inner face cubies, the cube has become a Supercube. This means that the inner face pieces have to be placed correctly. Together with the incomplete labeling, this makes the 4×4×4 Domino Cube very hard to solve. Build and scramble it at our own risk!
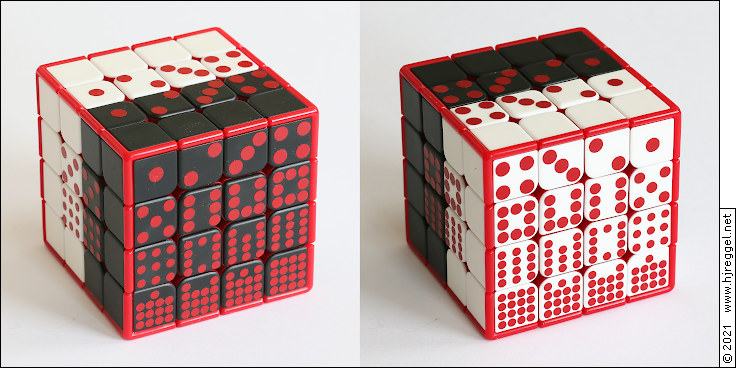
There is a "Checker Cube" by Meffert's that is supposed to show a black and white checkerboard pattern when solved. The Cube can also be solved in a black and a white half. Therefore, it can be used as base for a 4×4×4 Domino Cube. At first glance, it seems that the cube has an outer frame in red color. But actually, the whole cube is red, with black and white tiles attached. If the dots are made of the same red tone as the body and frame, the Domino Cube will get a very special look. The only drawback is that one of the white tiles holds a relief of the Meffert's logo. One way is to get two Checker cubes, and swap the logo tile with an empty white tile. This way, you can get a Scarlet Domino Cube, plus an original Checker Cube with two logo tiles. Otherwise you would have to cut off the logo, and grind the tile before stickering.
 | |
| 4×4×4 Scarlet Domino, Left: black side, right: white face. | |
funCUBING Index Page · funCUBING Projects · The Domino Project · Top of Page